1. Introduction to Landguard Raised Beds
If you’re looking to enhance your gardening experience, landguard raised beds might be the perfect solution. These innovative gardening structures not only provide a defined space for your plants but also offer an array of benefits that traditional gardening methods simply cannot match. In this comprehensive guide, we will explore what landguard raised beds are, their benefits, key features, installation tips, and ongoing maintenance recommendations, as well as troubleshooting methods for common issues you may encounter.
1.1 What are Landguard Raised Beds?
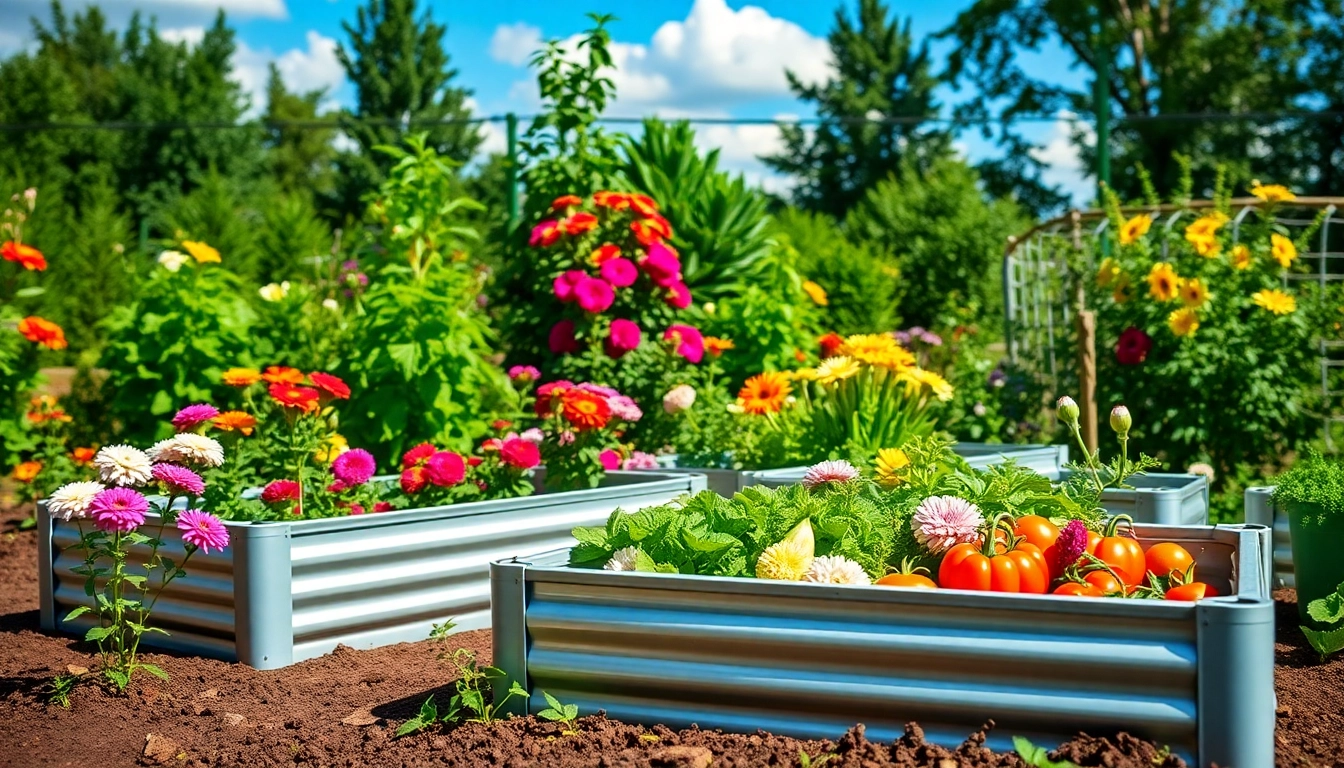
Landguard raised beds are specially designed garden containers that elevate your planting area above ground level. Typically constructed from durable materials such as galvanized metal or treated wood, these beds create a controlled environment for growing various types of plants, from vegetables and herbs to ornamental flowers. The elevated design also helps to manage soil quality, drainage, and plant accessibility, making gardening both easier and more productive.
1.2 Benefits of Using Landguard Raised Beds
- Enhanced Soil Quality: With landguard raised beds, you have full control over the soil composition, allowing for better drainage and nutrient management. This is especially useful if you have poor soil quality in your garden plot.
- Reduced Pest and Disease Issues: The elevation of the beds keeps plants away from ground-dwelling pests and diseases, minimizing the risk of infestations and improving plant health.
- Easier Access: The height of raised beds reduces the need to bend over, making gardening easier for people of all ages, especially those with limited mobility.
- Extended Growing Season: The soil in raised beds warms up faster in the spring, allowing for earlier planting and an extended growing season.
- Customization: Landguard raised beds can be easily customized to fit any garden layout, allowing gardeners to design their space according to their preferences.
1.3 Key Features of Landguard Raised Beds
When choosing landguard raised beds, several key features set them apart from conventional gardening methods:
- Durability: Typically made from galvanized metal or treated wood, these raised beds withstand the elements and provide long-lasting performance.
- Varied Sizes: Available in multiple dimensions, landguard raised beds can fit any available space, from small urban gardens to spacious rural yards.
- Easy Assembly: Many models are designed for quick assembly, often requiring minimal tools, which is especially beneficial for novice gardeners.
- Drainage System: Elevated designs often come with integrated drainage solutions, which helps to prevent waterlogging and ensures optimal plant health.
2. Preparing Your Space for Landguard Raised Beds
2.1 Choosing the Right Location
The location of your landguard raised beds plays a crucial role in the success of your garden. Here are some tips to consider:
- Sunlight: Select a spot that receives at least 6 to 8 hours of sunlight per day. Most vegetables and flowers thrive in bright sunlight, which is essential for healthy growth.
- Accessibility: Ensure that the beds are easily accessible for planting, watering, and harvesting. This is especially important if you have any mobility challenges.
- Proximity to Water: Position your raised beds near a water source to simplify the irrigation process.
- Wind Protection: If possible, choose a location that provides some protection from harsh winds, which can damage plants and dry out soil.
2.2 Soil Preparation for Optimal Growth
The soil used in landguard raised beds is critical to the success of your garden. Here’s how to prepare it:
- Compost Base: Start with a good layer of quality compost at the bottom of your raised bed. This helps with drainage and provides essential nutrients as it breaks down.
- Soil Mix: Combine garden soil, potting mix, and compost in a ratio of 2:1:1. This mixture ensures a nutrient-rich environment for your plants.
- pH Testing: Test the soil pH before planting. Most vegetables thrive in a pH range of 6.0 to 7.0. Adjust the pH if necessary using amendments like lime or sulfur.
2.3 Tools and Supplies Needed
Before you start installing your landguard raised beds, gather the necessary tools and supplies:
- Shovel or spade
- Garden rake
- Measuring tape
- Level
- Quality compost
- Garden soil and potting mix
- Watering can or garden hose
3. Installing Landguard Raised Beds
3.1 Step-by-Step Installation Guide
- Mark Your Area: Measure and mark the area where you want to place your raised beds using stakes and string.
- Clear the Area: Remove any weeds, grass, or debris from the marked area to prepare for installation.
- Assemble the Bed: Follow the manufacturer’s instructions to assemble your landguard raised beds. Ensure everything is level and secure.
- Add Soil and Compost: Fill the frame with your prepared soil mix, leaving space at the top for mulch or additional planting materials.
- Water the Soil: Lightly water the soil to settle it, ensuring that it is moist but not waterlogged.
- Shape the Garden: Consider the layout of your plants and mark areas for planting accordingly.
3.2 Common Installation Mistakes to Avoid
To ensure a successful installation, watch out for these common pitfalls:
- Ignoring Sunlight: Failing to select an optimal location may lead to stunted growth due to inadequate sunlight.
- Poor Soil Quality: Using poor-quality or contaminated soil can adversely affect plant health. Always use a proper soil mix.
- Overwatering: Install a proper drainage system to prevent waterlogging and root rot.
- Incorrect Assembly: Ensure the structure is built correctly to withstand the weight of the soil and plants.
3.3 How to Customize Your Landguard Raised Beds
Customizing your raised beds can enhance their functionality and aesthetics. Here are some ideas:
- Add Trellises: Consider installing trellises for climbing plants such as peas or cucumbers to maximize vertical space.
- Paint or Stain: Use non-toxic paint or stains to enhance the appearance of wooden raised beds and blend them with your garden aesthetics.
- Built-in Seating: Design raised beds with built-in seating adjacent for easy access and comfortable gardening.
- Companion Planting: Plan your layouts to incorporate companion planting, which can enhance growth and deter pests.
4. Planting and Maintenance Tips for Landguard Raised Beds
4.1 Selecting Plants for Your Raised Beds
Choosing the right plants can significantly impact the success of your raised bed garden. Consider the following:
- Climate Compatibility: Select plants that are suitable for your local climate zone to ensure they thrive.
- Growing Seasons: Plan for succession planting by including both cool-season and warm-season crops.
- Plant Size: Mix different sizes of plants to utilize vertical space effectively. Taller plants can be planted toward the back, with shorter varieties in the front.
4.2 Watering and Fertilization Best Practices
Proper watering and fertilization are crucial for maintaining healthy landguard raised beds:
- Consistent Moisture: Keep the soil consistently moist, especially during dry spells. However, avoid overwatering to prevent root rot.
- Organic Fertilizer: Use organic fertilizers to promote healthy plant growth. Top-dressing with compost can also provide nutrients throughout the growing season.
- Mulching: Apply a 1-2 inch layer of mulch on top of the soil to help retain moisture, suppress weeds, and regulate soil temperature.
4.3 Seasonal Maintenance Tasks
Regular maintenance tasks can optimize the performance of your raised beds:
- Fall Preparation: At the end of the growing season, remove any dead plants and debris to prevent disease and pests from overwintering.
- Spring Refresh: Replenish lost soil and nutrients by adding compost and organic material at the beginning of each growing season.
- Weed Management: Regularly check for and remove weeds, as they compete with your plants for nutrients and resources.
5. Troubleshooting Common Issues with Landguard Raised Beds
5.1 Identifying Pests and Diseases
Being vigilant about pest and disease management is essential in any garden:
- Regular Inspections: Routinely inspect your plants for signs of pests such as discoloration, holes, or unusual growth patterns.
- Integrated Pest Management: Use a combination of cultural, mechanical, and biological controls to manage pest populations effectively.
- Companion Planting: Incorporate companion plants that naturally repel pests, such as marigolds, which can deter nematodes and other insects.
5.2 Soil and Nutrient Challenges
Monitor the health of your soil to avoid common issues:
- Soil Testing: Conduct periodic soil tests to check for nutrient levels and pH balance, making adjustments as necessary.
- Compaction Prevention: Avoid compacting the soil by not stepping in the raised beds; instead, use pathways for access.
- Nutrient Deficiency Signs: Watch for signs of nutrient deficiencies such as yellowing leaves, which might indicate a lack of nitrogen, or poor flowering, suggesting a deficiency in phosphorus.
5.3 Tips for Maximizing Yield in Raised Beds
To make the most out of your landguard raised beds, consider these strategies:
- Plant Intensively: Plant closer together than you would in traditional gardens to maximize space and yield.
- Succession Planting: After harvesting a crop, immediately replant the space with a different crop to extend your growing season and increase productivity.
- Regular Feeding: Continuously feed your plants as they grow with organic fertilizer to ensure they receive the nutrients they need throughout their life cycle.